

Daleem is a rich stew made with either chicken, mutton, or beef including various dals. This is a slow-cooked delicacy usually enjoyed during ramzan season. When you master this, it can be enjoyed any day! Making daleem takes a lot of time and manpower. Since this recipe is a home-style version it can be done slightly quick and the outcome is satisfactory. It is healthy and tasty. So let's get started..


To Make This Recipe You'll Need :
Mutton (boneless)
|
500 grams + 100 grams bones
|
Ginger garlic paste
|
1 ½ Tablespoon
|
Green chili paste
|
1 ½ Tablespoon
|
Onions sliced & fried
|
4 medium
|
Lemon juice
|
3 to 4 Tablespoons
|
Ghee/ clarified butter
|
½ cup
|
Salt
|
to taste
|
Fried cashews (optional)
|
As needed
|
Oil (or) ghee
|
As needed to cook the mutton
|
For the Daleem masala powder :
Kabab Chini/ tailed pepper
|
1 teaspoon
|
Shahi Jeera
|
1 teaspoon
|
Green cardamom
|
8 nos
|
Cinnamon sticks
|
2 nos
|
Peppercorns
|
1 teaspoon - 2 tsps.
|
Cloves
|
6 – 7 (or) 1 teaspoon
|
Cumin/ Jeera
|
2 teaspoons
|
Here's the picture for you, if you're not familiar with the spices.

For the dals :


For the dals :
Moong dal / yellow lentils
|
1 teaspoon
|
Urad dal
|
1 teaspoon
|
Barley
|
1 teaspoon
|
Chana dal/split Bengal gram
|
1 teaspoon
|
Almonds/ badam
|
10 nos
|
Pistachio nuts
|
10 nos
|
Oats (any variety)
|
1/4th cup
|
Dalia/ Broken wheat
|
½ cup
|
Here's the picture of dals and nuts if you're not familiar with :

Method :
1. Begin by making the masala powder for the daleem.
2. Make the dal and nut powder.
3. In a cooker add oil (or) ghee and add the mutton, ginger garlic paste, green chili paste, salt, and the daleem masala powder, add enough water and cook until the meat is cooked well. The meat should be super soft. In a pressure cooker, it takes around 7 to 8 whistles.
4. Now, separate the mutton and the bones. Keep the bones stock safe in the cooker.
5. Shread the muton pieces using a fork. (Just the way you pull the meat for pulled sandwiches)
6. Return the meat to the cooker.
7. Add the dal and nut powder and add enough water for it to cook.
8. After the cooking of powder/ flour is done, start mashing it with a wooden hand masher or any heavy spoon which can serve this purpose. The idea to mash this is to give the daleem its signature texture, the shreds of the meat. This will take about half an hour.
9. Now add half of the fried onions to the daleem, mix it, add ghee, mix it well and finally add the lemon juice and mix well.. (when I say, mix well, it's about bashing the meat into strands)
10. Once you're happy with the texture of your daleem , serve it with fried onions, cashews, and boiled eggs.
Pictorial :

Begin by making the masala powder for the daleem.

Daleem masala powder is ready.

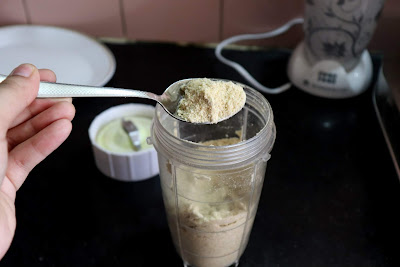
Make the dal and nut powder.

Dal and nut powder is ready.

In a cooker add oil (or) ghee and add the mutton

ginger-garlic paste,

green chili paste

salt

daleem masala powder (add the entire masala)

add enough water and pressure cook until done.

Now, separate the mutton and the bones. Keep the bones stock safe in the cooker.

Shread the muton pieces using a fork. (Just the way you pull the meat for pulled sandwiches)

Return the meat to the cooker.
Add the dal and nut powder and add enough water for it to cook.
(This is how it looks with the raw flours)

After the cooking of powder/ flour is done, start mashing it with a wooden hand masher or any heavy spoon which can serve this purpose. The idea to mash this is to give the daleem its signature texture, the shreds of the meat. This will take about half an hour.

mash mash

Yuppie!!

Now add half of the fried onions to the daleem, mix it,

add ghee, mix it well and

finally, add the lemon juice and mix well..

Enjoy!
Notes :
1. You could add garam masala on top before serving.
2. When reheating the leftover daleem, add water and adjust the seasonings.
3. You could add rice, masoor, and toor dals and other nuts to your daleem.
4. If you want to skip the 4th point. Use mutton bones stock while cooking instead of water.
5. During the process of mashing the meat, the stove is still on. Switch off the flame once the daleem is ready.
5. Always serve daleem hot.

A picture in the soft day light !

Thank you for visiting Blessy's Kitchen :)


